Showing posts with label Study. Show all posts

Home Office Update: Paint and Chandelier

Jan 16, 2018

We're having a snow day today! It's the second time this year, which is unheard of for Houston. My kids took the tops off the plastic Christmas bins and are using them for sledding down the hill in the backyard. It feels like 15 degrees so they are in and out of the house, which is driving me crazy! It looks like the temperature isn't going to be above freezing until tomorrow afternoon so I'm pretty sure there will be no school again tomorrow due to the ice on the roads. When it snowed in November we were all so excited because it had been so many years since we had seen snow. It was also the first time I have ever seen it stick to the ground in Houston. It looks like we're going to have a repeat of that weather today!


I mentioned a couple of posts back that I was planning to do an office update. I was considering a few options at the time of where to add the wainscoting and what color to paint it. The decision was made pretty quickly after I typed out that post. Sometimes I just need to organize my thoughts on paper (or on a computer screen) to work it all out in my head.

We started with plain white walls and a builder grade light. The furniture is old, but the rug is new. My husband and I started hanging the moldings first. I completely forgot to snap a pic. Here is an IG story pic I posted after we hung the chair rail and taped out the other areas the trim will go. I was trying to figure out how big to make the three boxes at the time.


The trim on the walls went up so fast! I didn't time it, but it only took a few hours. The next step was to pick the wall color and chandelier. I mocked up the lighting I was interested in using the pic collage app. It helped me visualize what it would look like once it was installed by taking a measurement of the middle box and fitting the light inside it so the scale would be correct. The paint was a bit difficult to nail down, but I finally settled on the far left color. It's Sherwin Williams Summit Gray. 


Here it is all complete! The chandelier is up and the walls are painted. I also painted the crown moulding and the baseboards the same color to give it an authentic paneled look. It took two full days, but it was so worth it. It feels dark and moody, but not too dark. It's just cozy and comfortable. I told my husband it's like a men's study/cigar smoking room. He won't be smoking in here of course! The next step is to pick the artwork for the middle box. 


You might notice the side walls only have wainscoting on the bottom third of the wall. It's like that all the way around the room. All of the crown moulding is painted gray. I just hadn't gotten to it yet in this picture. Only the back wall is completely painted gray. The top two-thirds of the walls will have a faux grasscloth in a sand color.


Here is a better pic of the chandelier from the website. I'll also link it at the bottom of this post. 


Once the artwork and wallpaper is in I'll give you a better tour of the room. That is all I'm going to do in this room for now. I'd like to eventually add new furniture, drapes and hardwired sconces on the back wall. Those things can wait a while as I move on to other projects. My goal was to do just enough to make it presentable. I think the before and after is already a huge improvement. 


Before


After(ish)


I typically remodel my rooms in phases. I start with a detailed plan and then decide what can be done to make it look nice and functional even if it's not completely finished. It's not ideal, but we have to address other home projects that are more important first. Even though we aren't looking to sell our home it's a good idea to take this approach because if we do sell we'll have completed the projects that buyers would expect to be done. I have an entire list of things that include touch-up paint, refinishing the marble counters in the kitchen, and installing a balcony railing on the back porch. The latter is at the top of my priority list since it's a safety issue. However, if I happen to come across a great deal on office furniture I might just change my mind!


SHOP THIS POST


New Year, New Project: Home Office Inspiration

Jan 1, 2018

Happy New Year! I hope everyone enjoyed the holidays. My favorite part of the holidays aren't the big celebrations, but the quiet evenings by the Christmas tree and fire. It's one of the reasons I still haven't taken down my tree yet. I just love when it lights up at 5 o'clock every evening. My husband said I should just buy a big ficus tree and put lights on it to enjoy all year. I really lol'd at that one! 

The bright side of the holidays being over is that I can focus on the projects I've been putting off the past couple of months, namely the home office. I started planning out the design this summer, but kept changing my mind. I have to admit it was all due to not wanting to spend a lot of money on a room that isn't regularly used or seen by visitors. My first thought was to hire someone to build built-in bookshelves. That's what all legit home offices need, right? 

My biggest inspiration came from a model home in my own neighborhood. When I saw this study I wanted to copy every detail (minus the furniture). The dark gray paneled walls, the bookcases and the sconces were exactly what I had in mind. I would have added filing drawers to the bottom of the bookshelves to be more functional. When I started dissecting the details on the actual cost that's when I realized the millwork was going to be very expensive. My husband and I can DIY the wainscoting, but not the bookshelves. That's when I decided to skip the non-functional shelves and just work on the wainscoting.


Huntington Custom Homes


I've found several examples of beautiful wainscoting. It has made my decision a bit harder. I could go with paneled walls all around the room. We would just paint the walls the same color as the trim so it would be faux. I thought about using wood floor to ceiling, but the cost of materials would be too expensive. I really don't want to redo the baseboards and the crown either.


Another option would be to wallpaper the room in grasscloth and use trim. It would avoid the faux wood look of the walls. The cost of the wallpaper and having to hire someone to hang it made me hesitate on this option. It also seems less like an study and more of a bedroom look. I decided to scrap this one, but I still want to show you the picture because it's so pretty. I may end up with his look in another room!


A third option is to partially panel the room. I could have wainscoting to the ceiling on the main wall behind the desk and then only on the bottom half on the other three walls. The top could be painted and maybe eventually wallpapered by myself. I think I might be able to handle small sections. I just love the shine of grasscloth, but I would also get the paneled study look with this option. I'm leaning towards this idea.


We decided to start hanging the moldings today! I just need to have my coffee and breakfast taco first. We're going with the last option, but we can always go back and add trim to the top of the last three walls if we decide that would look better. 

The next decision is the color of the trim, which will either be white or gray to go with the rest of the house. If we go with white wainscoting the other three walls with be painted gray or have gray wallpaper. If we go with gray wainscoting the walls will be a sand color like in the above photo. The first step is to get the moldings up. If everything goes correctly I'll post progress photos on my Instagram stories!


What You Need to Know About Buying a Fixer Upper

Apr 12, 2015

I love home improvement shows, especially the before and after that magically happens in two days. Unfortunately, that's not even close to real life. I have bought and remodeled two fixer uppers on a budget and still spent a small fortune. Approximately 80% of my weekends have been sacrificed over the last 15 years to DIY projects, too. That is the reality! When I saw both of the homes we bought for the first time I pictured what they could look like in my head. I can't say everyone shared my vision at the time, but they came around as the rooms started to take shape. What I didn't know was how much everything would realistically cost and how much time it would take to complete each room.

It all started with home shopping. I told myself some whoppers of lies that I hear other people say as well.

It's just paint. This may or may not be true. If you have 17 foot tall ceilings and the entire house needs to be painted inside and out, it's thousands of dollars of paint. The contractors had to build scaffolding to paint this room.


I could have bought a used car for what we paid to have the exterior painted.


Even for simple rooms you need to ask yourself if you can paint or do you think you can paint? It's not easy to cut in around ceilings and doors. It has taken me years of practice to correctly use an angled brush. You also need to factor in the cost of ladders, paint brushes, painters tape, drop cloths and other accessories.

We can live with it for a while. It will become the bane of your existence. That's what I said about most everything in my house when we moved in. "It's not what I would have picked, but it's not terrible." I found myself a few days before Christmas one year tearing out my carpeted stairs. I couldn't handle it one.more.day. A while somehow turns into years as other things take precedence, like a new roof or air conditioner.


DIY will be fun! No, it won't. I think my husband and I almost needed marriage counseling after building these living room shelves and fireplace mantel. It was one of our first projects and we were beyond frustrated with each other. I have since learned how to nicely say the shelves aren't level and he has learned to use a level.


Okay, it's not all bad. There is an amazing sense of accomplishment and pride when you are finished with a project that is 100% uniquely yours.
 
There are things that I wish I would have done differently to make things go so much smoother and on budget.
 
Get Organized. Start from the day you walk through a new house. Make a list of everything you want to change, from the big remodels to the lighting fixtures. Estimate the cost of the projects by visiting home improvement stores or contacting a local contractor. Add this amount to the sales price of the home for the real cost. It's a great way to put things in perspective and accurately compare homes. The updated house down the street for a bit more might not seem so expensive now.


Will you get your money back if you sell? I watch the housing market very closely. I don't always wait to remodel just because I am still saving for it. Once I decide a project will get me a complete return or close enough to it, that's when I start my project. Home values aren't known for going up all that much where I live, which is why most people don't remodel here. Adding a granite countertop or a new wood floor in the family room is usually the extent of an update. I've also seen formerly nice neighborhoods drop in value here. Luckily, I don't believe this is the norm for most of the country.

I also think because we are so emotionally invested in our homes and neighborhoods it's hard to admit when it's not working for your family any longer. As families grow or children leave for college, what you need out of a home changes. I never thought I would need a mudroom for backpacks and shoes until I had three school age children. When I saw them in magazines years ago I truly though they were unnecessary and extravagant. Silly me! It's amazing how these changes will sneak up on you. What works for you right now may not work for you in just a few years. Sometimes it just makes sense to move instead of trying to change your home.

Hire a professional. Sometimes hiring a professional will save you money. There are times I would have saved money getting it done right the first time. That was plumbing for me. Never again. Get a free quote and you might be surprised. Sometimes the price is worth it if you are in a time crunch and just want the project done. One thing I have learned is to put my family above any project we have going on. I have hired painters for rooms I could have easily painted on my own, but I wouldn't have made it to reading groups or math tiles at my son's school. Also, consider hiring an interior designer on a consulting basis for those hard to figure out rooms or just to pick out finishes. It can also save you money and time in the long run.

Big Announcement Here

I have not mentioned this before, but I have been working with clients as an hourly design consultant. It started through word of mouth as people have read my blog. It's easy for me to relay my knowledge in a short amount of time for their problem areas, guide them in the right direction, or stage their homes to sell. I love the way this is working out for me and my clients. It saves them money and frees up my time since (another announcement here) I started a full-time job working from home in the nursing field. Yes, I know this is a lot! These opportunities fell in my lap within months of each other and I didn't want to say no to either of them. Who doesn't want to decorate homes and work in their PJs?! It's also the reason I haven't been blogging quite as much. I can't say what the future holds for either of these careers since they are both new and it will be a bit of a juggling act once you throw in family life, too. It's such an exciting time and I hope to share even more updates with you soon!


Sorry, for the side note. I'll get back on topic! You might be wondering why I would buy two fixer uppers if the cost and stress were more than I ever intended. It was worth it! I'm definitely one of the most picky people you will ever meet. I have never found one house in my price range that didn't need a remodel in my eyes. If you are like me, you will be tearing out a perfectly nice countertop or floor because you don't like the color. It makes more financial sense to buy something a bit cheaper if you are going to redo everything anyway. Despite the high cost I have managed to come out ahead financially through careful planning. The best part is I have a home that I love!


Neutral Home Office Reveal

Sep 1, 2014

Remember that mudroom I was planning on finishing last week? Well, I took one look at the mess in there and shut the door on it. I'm not kidding. I literally shut the door after opening it and thought this can wait. After spending all summer long at home with the kids I wanted to celebrate them going back to school with a much needed shopping trip. ;) I found a large wall clock at ZGallerie last Monday I knew would be perfect in the office and it spurred a week long decorating spree. I've always thought of myself as a slow DIYer. Well, I obviously make up for it in the shopping department!

If you remember, this home office used to be a formal living room. We hired a contractor a couple of years ago to build two walls to enclose it and add a set of French doors, and voila...we have a home office. I bought the main furniture pieces, but I never finished decorating since I had already moved on to other projects. Well, it is now done!


I tried to camouflage the TV by adding a photo gallery of the kids above it and tall accessories on either side. I think it works since my mom never noticed it when she first looked at the room. The downside of having a TV in here is that my husband never wants to leave. He said he just needs a bar set up in the corner somewhere. I think he watches too many soap operas.

I have always loved neutral rooms and thought it would be a good choice in here since my husband and I share this office. I mixed light and dark shades of neutral, a touch of rustic for him, and a bit of feminine for me. I noticed I gravitated towards the darker shades and more rustic pieces while shopping this week, probably because I have fall on the brain!

This is also Mario's favorite room. The chair near the window is his spot to bark at all the neighbors walking by.


He takes his guard dog job very seriously.


Unfortunately, he is also the reason there isn't a rug in this room. It's a good thing he's cute.

This room is heavy on accessories. I noticed it helps distract your eye when the room is cluttered with work-related messes. I think I will have to try this approach in the great room. That room gets messy fast!


As with all of my rooms, this one was also done on a budget. Here are the details of where I got most everything.

Pottery Barn Desk-Found secondhand online
Credenzas and Baskets-Ikea
Desk Chair-World Market (with a coupon of course)
Desk Lamp-Ikea
Credenza Lamp-TJ Maxx
Wall Clock-ZGallerie
Shelves-Target
Mirrored Map Picture-Homegoods
Key on Wall-Garden Ridge
Burlap Pinboard-Homegoods
Orange Tray-Target
Side Chair-Target
Plaid Throw-Ikea
Throw Pillow-Pottery Barn
Drapes-Ikea
All Picture Frames-Target
Horse-ZGallerie (years ago)
Glass Vase on Desk, and Hourglass and Iron Globe on Wall Shelf-World Market
Globe on Credenza-Homegoods
Box on Credenza-Bought last year at Homegoods
Gray Candle on Credenza-Ikea
Letter Tray on Desk-Target
Copper Candleholders-Bought last year at Target
Basket on Desk with Accessories, "C" on Desk, Stack of Books on Desk, "&" on back Credenza-Hobby Lobby


The Scoop-134-stonegableblog


New House Updates

May 21, 2014

I haven't updated since last week because it's been crazy around this house! I had one of those weekends where my kids must have been slipped an energy drink. Anyway, I was recovering on Monday morning with a cup of coffee and did not get into my usual frentic cleaning routine since weekends turn my house upside down. I puttered around and noticed some changes needed to be made. I moved a few things around and began getting ideas. I know I'm not the only one that does this!

I bought a chair recently from Target.com for my living room. It was cute, cheap and would go perfect in the corner of the room near the tv. It arrived quickly, but I had to put the entire thing together. It wasn't a simple screw in the legs either. I thought it looked a little small, but when I put it in the corner I realized it was extremely small. I've been trying to come up with ways to make it work because I really didn't want to go through the hassle of shipping it back. I realized on Monday there was no way I could keep it in my living room. I put it in the office as a desk chair and it was even too small for the desk. Who knew there were even chairs this small?! I tried it in the tiny space that I thought was too small for a chair across from the desk and it fit perfectly!


I've been considering adding a bit of tan in here for a while, but this sealed it. I dug out some old Ikea linen (linen-like) curtains and they went great. I still needed a desk chair and immediately knew one that would go perfect from World Market. I took a girlfriend with me and she watched my indecision firsthand as I stared at it. She's seen me do this before so she dared me to buy it, lol. So, I did!


It's amazing how two chairs and a pair of curtains have transformed this room. Now, I just need to clean it up and hang the pictures I bought a year ago on the walls. If you're wondering what took me so long to work on this room it's because I avoid it like the plague. My husband took this office over and uses it to work out of the house a few days a week. There is stuff everywhere and I don't know what's important to keep or throw away. I have just been shutting the door with the hope he'd eventually find the time to straighten up. It never happened, but he will now be working out of his real office in the city instead so I'm taking this room back! Yes! He promised me we would de-crapify it this weekend. We'll see...

While I was at World Market I also picked up these cute wooden starfish. I've never been one for seasonal decorating until the past couple of years. I used these and a few other things I already had to make a summer centerpiece for my island. It's a bit cheesy, but the kids like it. Okay, the kids don't care, but I like it. I'm sure I will be horrified and think WTH was I thinking later, but it works for now.


And, finally...the oar in my son's room got it's stripes. Do you remember me saying last week I was going to paint red stripes on it?

DSC_3904


Well, I actually did it and love the way it turned out!


It took me less than twenty minutes to tape off and spray paint it. I roughed it up a bit after it dried so the red would look a little distressed like the white areas. My son still isn't interested in his room, but that's okay. It just gives me free reign to do whatever I like in here. ;) I'm off to buy a few things today and keep this decorating mojo going! Have a great week!


DIY Chevron Pinboard

Apr 29, 2013

This is one project I can finally cross off my list!


Several years ago, I bought a corkboard at Wal-Mart for about $7 to put in my son's room to display his artwork. He never used it, so I decided to put it in our home office. I've been meaning to revamp it for a while, but I'm not really a crafty person. I was secretly hoping I'd come across the perfect pinboard I could just buy and make my life easier. After almost a year of looking and refusing to pay $300 for a damn corkboard (sorry, but that's just criminal), I finally decided to DIY it. I found a gray and white chevron fabric that was only $13 a yard so there were no more excuses.

After my husband took off the frame, it took me about ten minutes to cut and staple gun the fabric on the corkboard. It's not so pretty from the back, but no one will see that.


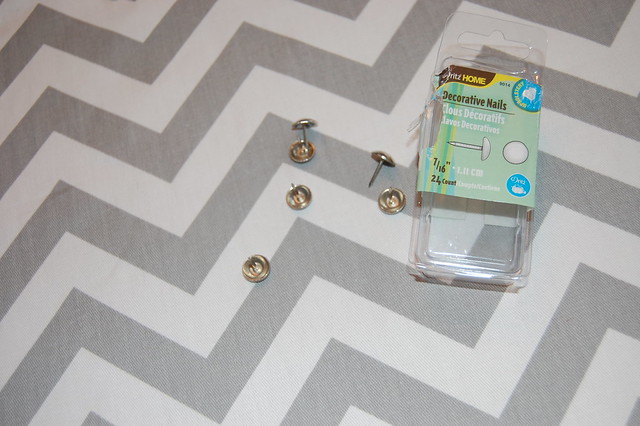
Then, I used decorative nailhead trim around the edges. My husband picked these up at the fabric/craft store for me. Now, that's love!


I started off measuring the left side with perfect 2.5 inch spacing. That was really annoying so I just eyeballed the rest and it turned out fine with a little adjusting.


Here it is in the office.


I'm not sure if that is really where I want it to go since I'm still tweaking the furniture and artwork. I was worried about making holes in the wall and then having to touch-up the paint if I decide to move it later on. Luckily, I had some Command picture hanging strips around that I never used.


I was not convinced these would hold the pinboard even though it isn't particularly heavy. I held it in place for thirty seconds per the instructions half expecting it to come crashing down when I let go, but it's still on the wall. Amazing!


This is hanging right above the kids' backpacks so it's a perfect spot to pin up papers and birthday invitations that I need to address right away. I have a tray for each of the kids in the office, but once it gets filed away I have a tendency to forget about it. I really need to have something visible to jog my scrambled/stressed out mom brain. It goes perfectly with the office and it took less than half an hour. Now, I'm kind of mad at myself for putting it off for so long!