Mudroom Shelves and Paint Color Resources

Feb 19, 2014

Sorry, for the late post this week. My internet has been down for a few days. I honestly have no idea why it’s working now, but I’m going to type fast in case it decides to crash on me again. Thank goodness for cell phones to keep me on top of the most important things, like bill paying and emails.

Speaking of emails, I was contacted recently by Jena from Involving Color about featuring my master bedroom on her blog. You can see the post here. It’s very flattering to be featured, but what’s more exciting is finding her blog. It’s completely devoted to paint and paint colors. What’s even better is the way it’s organized-by room, by color, by brand. I’ve been using Pinterest and Google to choose my paint colors before I even walk into a store. Her blog is an easier resource to finding the perfect paint color. I hope you check it out!

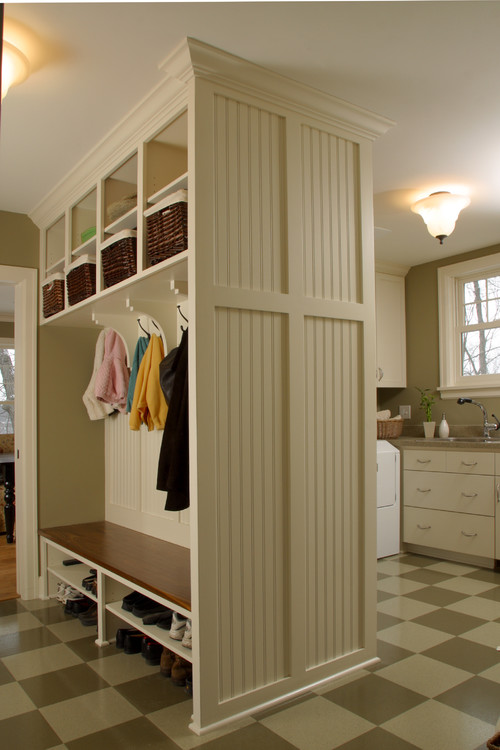
On to the mudroom progress. The built-in shelves are finally in place. I can’t tell you how confusing this was to figure out due to the weird angles in this closet. Even more confusing was to explain exactly what I wanted to my husband, the one who actually builds things around here. You would think after 16 years of marriage we would be able to figure out what each other is saying, but what we have here is a failure to communicate. After attempting to talk about the plans several times with the kids interrupting every thirty seconds, we just gave up. On Saturday, he decided to just get it done while I was out of the house. He showed me what he did when I got home and I said, “This looks amazing!” He said he was mentally prepared for a fight because he figured it was wrong! Nope. It was exactly what I wanted all along.

DSC_3817


DSC_3818

I think he deserves a gold star for figuring out these angles!

We ended up walling off the space on the back right (the brown board on the right side). It hurts my heart a little to decrease any storage space, but only a hobbit could get back there with the sloped ceiling. Anything that ended up back there would have stayed back there…forever.

DSC_3822


Here is a pic of it before we blocked it off. The ceiling height is a whopping two feet tall.

DSC_3786


The shoe cubbies are also done.

DSC_3819

Well, the far left one isn’t finished quite yet. At least we can use them. Now, if I could just get the kids to actually put their shoes in the cubbies we’ll be doing good. Oh, and they need to learn to shut the door so Mr. Mario doesn’t drag their shoes out and snack on them. I’m buying two new pair of kids shoes today…sigh.

To recap, here is a before picture.

DSC_3777


DSC_3778


Cleaned out.

DSC_3784


And almost finished....

DSC_3820

So, what do we have left to do? Obviously, the floor and the errant shelf on the left need to be addressed. We’re also going to build a shelf above the top coat hooks. The rest is just filling in the gaps with quarter round and lots of caulk. Then, it’s my turn to finish it off. I need to paint, replace the light, and add a few decorative touches. When I type it out it doesn’t sound almost done!


Mudroom Progress

Feb 3, 2014

The mudroom is moving along a lot faster than I ever thought. I can't say it's because of me either. I had asked my husband to install two 2x4 boards on the wall so I could add hooks for the kids backpacks and jackets. I was thinking the bench and beadboard could be built later. I didn't want to push my luck after all since I'm not the one doing most of the work. I'm the planner/designer and he does his thing with the saw. He said it would be easier to do it all at once and was ready to get started on it. Well, that went better than expected!

I hightailed it to Home Depot and bought all of the wood and trim before my husband could change his mind. This was a little more difficult than I expected because I needed a lot of 8ft boards. You should have seen the looks I got trying to load it into my cart and then into my car. I'm sure people were thinking, "What the heck does that girl think she's doing?" I have to admit that I had a moment in the parking lot staring at this random pile of wood that was supposed to turn into a mudroom. I was thinking, "Maybe I am crazy? Why can't I just be a princess type who would hire someone to do this?" Don't worry, I got over it once I started seeing it built.

Pity party aside, if you remember we had cleaned out the closet under the stairs after I had a light bulb moment that this would make a perfect mudroom. This is what we had to work with once it was cleaned out.

DSC_3784


It wraps around to the right. Under stairs closets can be so awkward.

DSC_3786


We had to remove the coat rack first. I was worried about the drywall getting damaged, but it was fine except for one small hole we were able to cover up with trim.

DSC_3787


Then, it was time to start building. Here is the progress we've made so far.

DSC_3795

The bench was built first. It sits on a frame we built out of 4x6 lumber and has cubbies for shoes. I didn't want the bench so much as to sit on as I did for heavy bags that might pull the hooks out of the wall. Also, I don't like to hang my purses because the handles get stretched out from the weight of it.

The beadboard on the lower section was added first, then the 2x4 the lower hooks are screwed into, then the top sections. We basically built it from the bottom up. I just finished screwing in the last of the hooks this morning.

If you notice the bench has braces in the middle of each cubby.

DSC_3796

That's because we are going to add a shelf in the middle of each one. I decided against baskets because I want to be able to see at a glance if the kids shoes are in here instead of having to go through each basket. We'll be able to fit eight pair of shoes, which should be enough since the kids only wear one pair at a time. That's one good thing about having boys!

I also want to add a shelf above the board that holds the top hooks. That's the reason these hooks are different from the bottom ones. I needed shorter hooks that wouldn't interfere with the shelf. After the top shelf is built and the shoe racks are in the cubbies, this wall will be done. I do have to paint, but that will be second to last on my list. The last thing to do will be to hire someone to finish out the flooring. Thankfully, we have three boxes left of the wood tile we used in the family room so the flooring will be continuous.

DSC_3804

And, the light! Yes, that will be changed. I'm thinking of adding wainscoting to that small section of ceiling first. It will be similar to the beadboard, but much wider.

Here is the rest of the closet.

DSC_3800

The section on the left will have built-in cubbies or shelves for baskets. It will start where the wall left wall ends and continue in a straight line to the end of the extra flooring. This will also help minimize the awkward angles of the closet. I'm planning on storing the kids school books they keep at home, extra paper products, and pool towels here.

I have not decided what to do with the back right of the closet. I'm leaning towards shelves since I do need a place to store gift wrap and seasonal décor. Another option is to block it off completely and add a wall under the spot the ceilings ends. This would allow us to wrap the bench and hook wall around in an L-shape for even more storage.

DSC_3802


It's crazy, but we could use even more hooks. This doesn't even include the kids backpacks and the jackets they wore to school today.

DSC_3809


Excuse the mess! I need to relocate that shelf from the closet to the garage asap. For reference, this is the closet we're making over in relation to the rest of the room. The garage door is down the hall to the left and the front door is around the stairs. It's directly across from the back door that leads to the pool. I love that it's in a central location since we use all the doors equally. I do wish we could keep the door off to the mudroom, but it's just too open to the family room for my comfort. The door will also keep Mario from eating our shoes. ;) If you notice, he made a bed out of the jackets I laid on the couch while I was installing the top hooks in the closet this morning.

DSC_3808

This is also a good picture of the left side of the closet where the built-in shelves or cubbies will be, which is the next project we'll be tackling.

I can't leave you with a picture of my messy living room.

DSC_3795


That's better!


New Project Plans: A Mudroom!

Jan 15, 2014

Well, technically it’s a closet. This is the place all of the odds and ends we seem to collect over the years goes…to die. It’s a huge closet under the stairs and we’ve cleaned it out more times than I can count. It has stored our Christmas decorations, important paperwork, photos, extra paper towels, old home décor, etc. Between our crazy amount of donations to Goodwill, the new home office, and new storage in the garage we don’t have an excuse for this any longer.

DSC_3777


DSC_3778

Thankfully, it doesn’t look as bad in the picture. I’m not kidding. If you’ve been wondering why I’ve been MIA this week it’s because I’m trying to integrate the things we are going to keep into our home office. Everything else has been donated, put in the attic, or in the garage. I still have two filing cabinets and three large bins to go through, but it’s coming along. Here is the closet now.

DSC_3784


DSC_3786

It’s clean, but ugly as sin. So, what prompted me to clean this mess up? Typical January organization? Nope. It’s when the lightbulb went off that this would make a perfect mudroom. It’s in a central location on our first floor so it doesn’t matter if we enter the house through the front door or the garage door. I have been complaining for a while that we don’t have enough hooks in the laundry room for a family of five. I need hooks for ten jackets, three backpacks, a briefcase and a couple of handbags. Oh, and hats! That might not happen, but it’s on my wish list. I also need a spot the kids can store their shoes that Mr. Shoe Fetish (aka Mario or the pupster) can’t find them them.

This project is going to take a while. I have to paint, replace the carpet, and sweet talk my husband into taking out the retired saw for some built-in shelving. But, can’t you see it? No. Well, I really don’t have a full plan yet either. The best part of a new project are the inspiration pictures. Here’s your eye candy because I know the pictures above aren’t doing it for you.


Beach Style Entry by Portland Interior Designers & Decorators Garrison Hullinger Interior Design Inc.

My new mudroom won't look like these, of course. There's only so much you can do with a closet, but I do hope to incorporate built-ins to decrease the slope and odd angles of the ceiling and walls. I can't wait to get started!


Projects for 2014

Jan 10, 2014

Are you ready for some projects?! The holidays are over and it's time to get moving. I feel like my kids when they wake up and cry that they don't want to go to school. I don't really want to get started on anything, but I know I it's time. When I wrote my to do list last year I had just finished all of the big projects downstairs and was excited to get started on renovating the upstairs of my home. I didn't finish the entire upstairs like I had planned, but I knew that was an overly ambitious goal.

Here's a quick recap of what I have done upstairs. The old, gross carpet was removed and we had new laminate flooring installed throughout the entire floor. This made a huge difference. Everything just felt clean and new. Then, we replaced all of the trim around the doors and windows, and put in a batten board treatment throughout the entire game room. I decided to work on the game room first since it's the first room you see when you go up the stairs.


I had planned on painting the game room myself, but I knew it would take forever just to caulk the trim. Since I had zero motivation and wanted this room done quickly, I hired someone to paint this room. I felt uneasy about paying someone so much money to do a job I knew I could do, but it was so worth it in the end. It took them three days and it probably would have taken me three weeks.


I spent very little on the décor since I already had the sofa and console. I added the rug, coffee table, shades, and accessories. Besides the kitchen, this is the first room I've actually finished in this house because I didn't have to buy any big ticket items.

And, my latest project still isn't finished either, the boys' bathroom.

DSC_3524

It's really close to being done so I will probably finish this room first. The hard work is done and it will help get me motivated to start on the rest of the upstairs, I hope.

So, what's next? My kids' bedrooms and my master bathroom is all that's left inside and they are in need of some serious TLC. The boys' bedrooms have gotten the most attention in this house since we've lived here, but look the worst since kids aren't "careful" with their belongings. Using the word "careful" is me being nice. I can't tell you how many times I've had to repaint walls, replace broken blinds, pick lamps up off the floor, scrape gum off the nightstands, etc. Because my little "darlings" will just tear it up again I am just giving it a spit shine with a bit of paint and a few accessories. Now, do you understand why half the furniture in my house is from Ikea?

And, on to the biggest project. My master bathroom should be a gut job because it's a 90s nightmare, but I'm planning on giving it a facelift instead with new paint, trim and fixtures. The shower, tile, vanity countertop and flooring will eventually need to be replaced. Unfortunately, I'm going to have to save that for later. I wish I had more time and money to devote to it, but we've really got to do something about my home's curb appeal.

The roof needs to be replaced, the siding pressure washed, and the landscaping addressed. My front yard has never been wonderful to begin with, but it was really damaged after having a tractor drive through the middle of it for our pool dig last summer. Oh, and my upstairs flowerbox is so sad with one lone weed creeping over the side. I'm hoping we can get working on the exterior this spring when the weather is nice. Until then, I will be working on the remaining interior projects upstairs. Fortunately for my wallet they are mostly paint projects, but I am not looking forward to the manual labor. I suppose I should say goodbye to any hopes of having a manicure this year.

The bright side is that these are the remaining big projects! Once these are finished I will be decorating, tweaking, and doing small DIY projects. Then, we'll probably move. We have no plans to move, but we moved after our last house was remodeled so it's a running joke in our family. Now, off to work! I'm not talking about DIY. I'm really running late for work!

Have a great weekend!


Choosing the Right Furniture for Your Room

Jan 6, 2014

Are you confused by Louis XIV, Neo-Classic, or Rococo period furniture? What is it? I really just included Rococo because I like the name. Maybe because it sounds like cocoa? Anyway, I don't blame you for not knowing. Whenever I visit a museum someone tries to talk to me about the period or style of the artist and I want to say,"I just like the colors." Or, "Why doesn't the Venus de Milo have arms?"

However, when it comes to actually buying furniture I want to make sure I'm not making a mistake. Why? It's because I'm frugal and want the piece to last as long as possible. I am not against mixing styles, but it does need to be intentional. For example, I love what Joni from Cote de Texas calls "the Houston look." Casual furniture that fits great with our warm Houston climate, but combined with European antiques for an elegant look. Perfect!

I've combined styles myself by choosing a French bistro chair and an off-white table in my breakfast room. The chair is rustic enough to blend with the cottage style table, but the elegant lines tell a different story.

DSC_3550_edited-1


I love the warmth and elegance of this chair so much that it inspired me to change a few other things in my living room.

DSC_3547_edited-2

The ginger jar, horse and orchid vase accent the chair in the breakfast room. It also keeps this room from looking too coastal. I love a coastal style, but prefer mixing it up to avoid a themed room. This works especially well if you are like me and love too many styles to choose just one.

If you need a little help identifying different furniture styles, check out One King's Lane new resource guide. To view it on their website, click under "site map" and then "home décor resource." You can also click here. I found a plethora of information and I especially love their guide on how to choose statement chairs. Who knew that one breakfast chair would send me on a tangent to switch up the rest of my great room?

We could all copy a look we see in a catalog and it would look fabulous, but most of us want to see a little of ourselves represented somewhere in the room. I think this is why almost no one does it. Our homes give us the most comfort when they reflect a little bit of our thoughts and experiences. You can tell I crave a spa-like environment when I'm at home with all of this white. I do have three boys and say,"Calgon take me away!" on a regular basis. Can you also tell I love the beach and was greatly inspired by my trip to London and Paris? Yes, this room feels like me. :)


Plugging Back In

Dec 30, 2013

The Christmas craziness is over! Have you recovered? I'm exhausted! It's hard being mom this time of year, but these smiles on Christmas morning make it all worth it.

DSC_3674


And, reactions like these are priceless!

DSC_3656

After stressing over the holidays, we decided to take an impromptu trip and unplug so we chose a remote location in Arkansas. Note to self, there's no unplugging when dealing with my boys. They have two modes-on and unconscious. It was still nice to get away from the responsibilities of home.

And the view of the Ozarks was all worth it.

DSC_3727


The first night we stayed at a lodge in a state park. It reminded me so much of the Wilderness Lodge at Disney World, but with a view of the mountains.

DSC_3714


My boys appreciated the indoor pool more than the view.

DSC_3710

Then, we took a scenic drive through the Ouachita National Forest to another state park outside of Hot Springs. This time we rented a cabin that sat right on the lake for a bit of hiking and fishing. I really just wanted to read and sit by the lake, but we kept busier than we thought.

DSC_3730


DSC_3733


My little guy enjoyed the view of the lake from the screened porch...for about 30 seconds.

DSC_3734

I have no idea why he only has on one sock. I'm not sure why he does a lot of things!

And my middle son helped dad start the grill...for about 30 seconds. He came back when it was time for smores, of course.

DSC_3735


The hike to the waterfall at the park was a highlight of the trip. The path was a bit more treacherous than I thought it would be, but we made it and had a lot of fun on the way. My little guy took his Minecraft sword to kill any bears that might attack us. We obviously only had to worry about dad having too much fun with the kid sword.

DSC_3768

I can't say I'm recharged and ready to tackle any new projects, but I am happy to be home and slowly get back up to speed. How was your Christmas? Are you getting ready for New Year's Eve?

We'll be spending ours here in the backyard-swimming in the hot tub, grilling, and making s'mores.

DSC_3585

We may or may not stay awake until midnight. Exciting, right? Have a great New Year's!

Christmas Tablescape

Dec 23, 2013

Can you believe tomorrow is Christmas Eve?! There are so many last minute details to wrap up today and tomorrow that my head is spinning a bit. I know I’m not the only one out there wrapping presents, running to the store, and getting their home ready for guests. At least I imagine everyone is just as busy as me because it makes me feel better. Smile

One item I can cross off my list is this year’s Christmas table. As always, my tablescapes are impromptu and very inexpensive since I usually shop my house and use glass containers that can be filled with holiday décor I already have. I don’t think I shared how inexpensive they are. My Thanksgiving table this year cost a whopping $3 for the gold pinecones I used as vase filler. I spent a bit more on Christmas, which came in at $14. I think this is the most I have ever spent!

Christmas Tablescape

I was so excited to find this red tablecloth on sale at Target for $8. I knew it would match my centerpiece perfectly that I put together from an old garland I made years ago. Reuse and repurpose when you can!

DSC_3625

The Christmas plates were a gift many years ago and the champagne glasses were purchased at Ikea last year.

DSC_3643


DSC_3644

I was too exhausted last night to worry about ironing the tablecloth. I’m hoping the wrinkles will fall out today. If not, I’ll live. Raising three boys has beat any type A personality traits out of me.

DSC_3624

I filled the glass cylinders with real cranberries, sprigs of garland from my breakfast room chandelier, and floating candles. My husband said, “what?!” when I started filling them with water to make the cranberries and candles float. Ha! I got the idea from wedding tablescapes I’ve seen on Pinterest. There are so many different things you could do with these glass cylinders-ornaments, branches, candles, pinecones, snow, etc. I picked them up several months ago at Target for $10 each knowing I would use them over and over again without ever having the same look.

DSC_3631

At least this room is ready for Christmas! Are you ready?


A No Bow Christmas

Dec 12, 2013

I love beautifully wrapped presents as much as the next person, but I’ve had kids and pets long enough to know that bows will not last a week in my house. By Christmas Day, I’m lucky if I even have one bow left on a present.

Recently, I came across this idea on Pinterest. You can buy the wrapping paper, ribbon and labels at this Etsy store.

No more bows!!! Love this look for Christmas wrapping.


But, I decided to try this using store bought tags and ribbon. One day I’ll be crafty enough to make my own, but not this Christmas. Here is my version.

DSC_3590


DSC_3589

You could definitely make this prettier with nicer wrapping paper and tags, but I let the kids pick out their own paper. I just asked that it have blue or silver this year to match the tree. I love that I can stack the presents on top of each other now without having to worry about the bows getting crushed. Why didn’t I think of this before?! Now, if I could just figure out how to keep the presents wrapped since prying little hands are undoing the edges of the paper.